I wanted to make a GUI in PyQt4 for my 3d-auv-simulator(this is what I named my GSOC project). So I started with the basic code found at the zetcode site. Alone, PyQt ran very smoothly. But as soon as I added Panda3d's
run() method in my code, everything seemed to go haywire. The PyQt window started crashing and the Panda3D window started hanging.What I realised late from all this was the fact that Panda3d's
run() method has its own event loop. In fact, it is the main loop running behind Panda3d. PyQt also has its own event loop. This was the reason why my code was crashing initially since a single program can have only one event loop.1. Use Panda3d's Direct GUI module instead of PyQt4. (But I like Qt more than any other GuI interface)
2. Use multithreading to separate the two event loops. (This is what I chose to do)
3. Use Tasks in Panda3d as an alternative to multithreading. (I haven't explored this yet)
Panda3d is built in C++. So its site says that its better to use this:
from direct.stdpy import threading
instead of this:
import threading
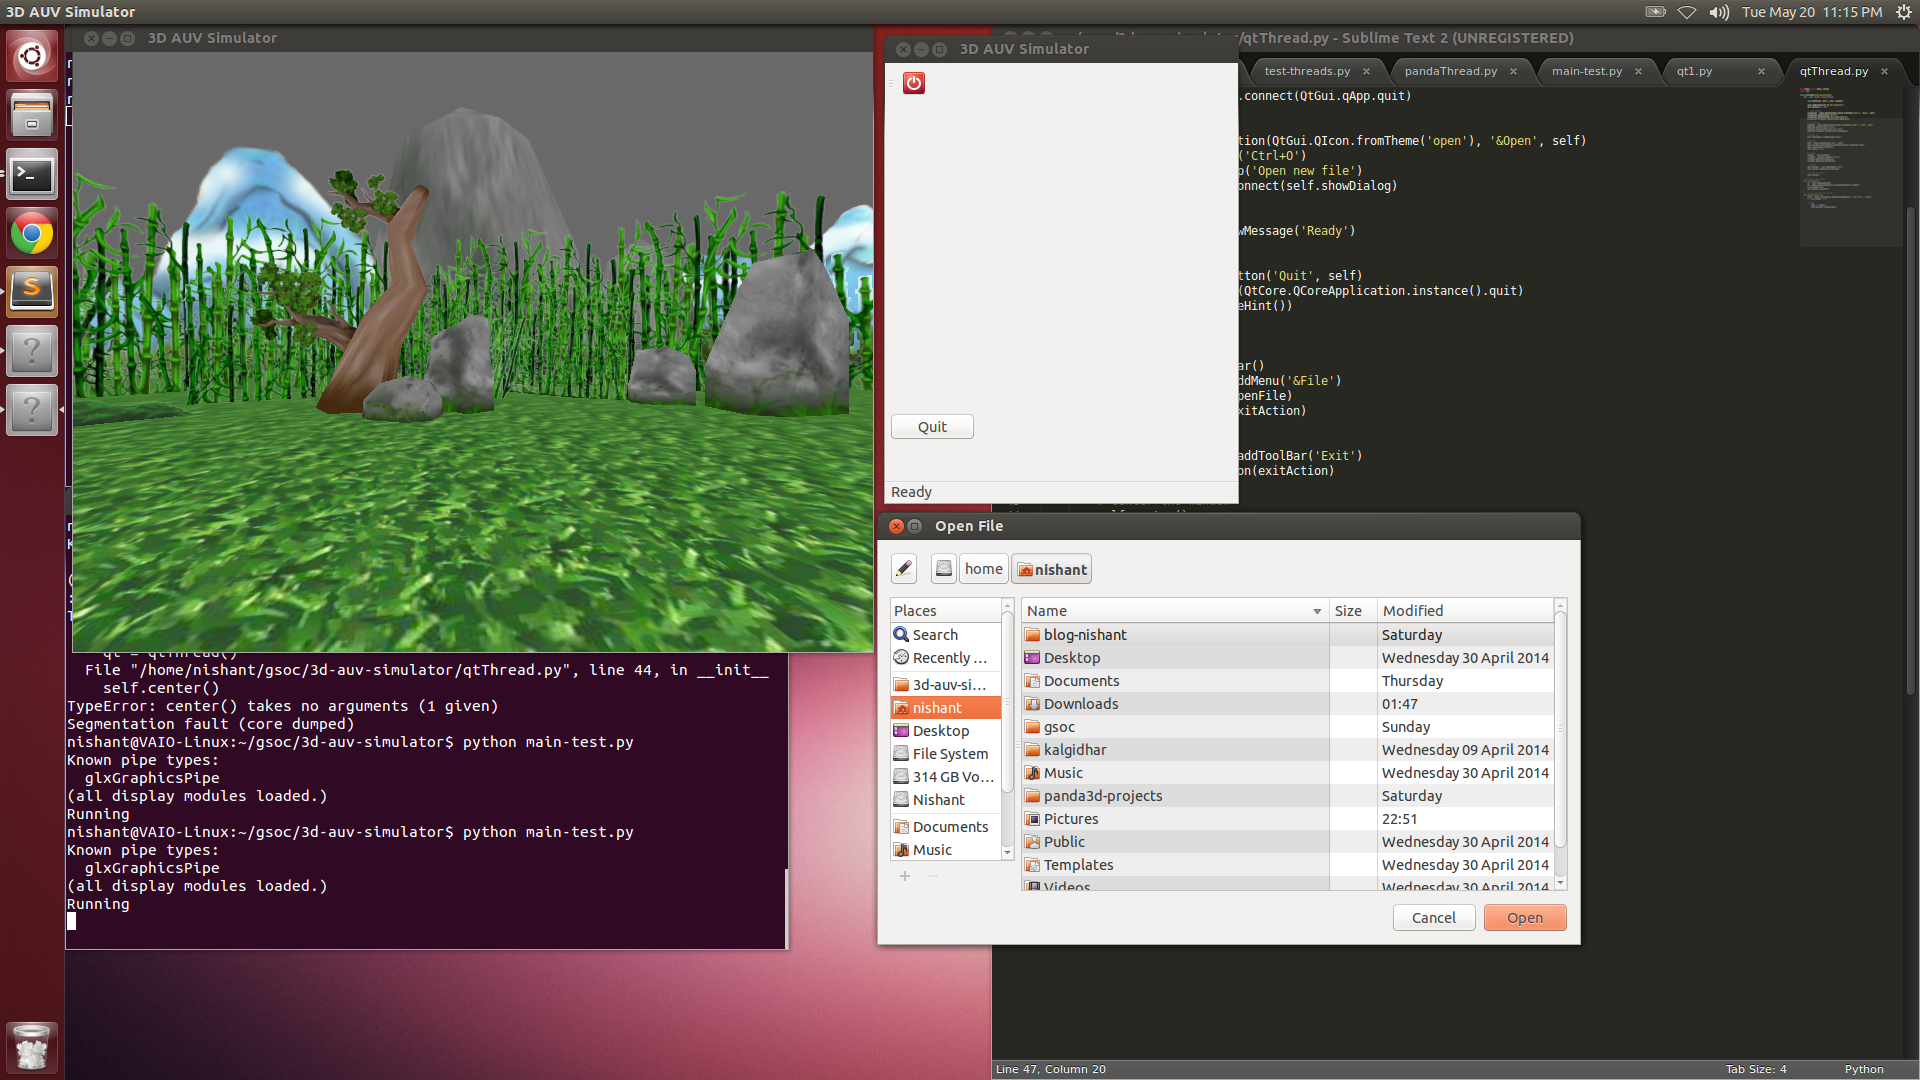
threading is the python's library to deal with threads. I wrote my code using this library. Other options are to use QThread library of PyQt4. Below are the 3 classes that I created. Run the main-test.py to see everything working.
from PyQt4 import QtGui, QtCore
import sys

class qtThread(QtGui.QMainWindow):
    def __init__(self, parent=None):

        super(qtThread, self).__init__(parent)

        self.setWindowTitle('3D AUV Simulator')
        self.resize(500, 500)

        #  exit action
        exitAction = QtGui.QAction(QtGui.QIcon.fromTheme('exit'), '&Exit', self)
        exitAction.setShortcut('Ctrl+Q')
        exitAction.setStatusTip('Exit Application')
        exitAction.triggered.connect(QtCore.QCoreApplication.instance().quit)

        # open action
        openFile = QtGui.QAction(QtGui.QIcon.fromTheme('open'), '&Open', self)
        openFile.setShortcut('Ctrl+O')
        openFile.setStatusTip('Open new file')
        openFile.triggered.connect(self.showDialog)

        # status bar
        self.statusBar().showMessage('Ready')

        # button
        qbtn = QtGui.QPushButton('Quit', self)
        qbtn.clicked.connect(QtCore.QCoreApplication.instance().quit)
        qbtn.resize(qbtn.sizeHint())
        qbtn.move(5, 350)

        # menubar
        menubar = self.menuBar()
        fileMenu = menubar.addMenu('&File')
        fileMenu.addAction(openFile)
        fileMenu.addAction(exitAction)

        # toolbar
        self.toolbar = self.addToolBar('Exit')
        self.toolbar.addAction(exitAction)

        # center the window
        self.center()

    # to center the window
    def center(self):
        qr = self.frameGeometry()
        cp = QtGui.QDesktopWidget().availableGeometry().center()
        qr.moveCenter(cp)
        self.move(qr.topLeft())

    #  to open the Open file dialog and print the filename selected
    def showDialog(self):
        fname = QtGui.QFileDialog.getOpenFileName(self, 'Open File', '/home')
        print fname
from direct.showbase.ShowBase import ShowBase
from pandac.PandaModules import WindowProperties
from pandac.PandaModules import loadPrcFileData
import sys

# loadPrcFileData("", "undecorated 1")
loadPrcFileData("","window-title 3D AUV Simulator")

class pandaThread(ShowBase):
    def __init__(self):

        ShowBase.__init__(self)

        base.useDrive()

        wp = WindowProperties.getDefault()
        wp.setOrigin(0,0)
        base.win.requestProperties(wp)

        self.dummyNode = render.attachNewNode("Dummy Node Name")
        self.environ = self.loader.loadModel("models/environment")
        self.environ.reparentTo(self.dummyNode)
        self.environ.setScale(0.25,0.25,0.25)
        self.environ.setPos(-8,42,0)
        base.camLens.setFov(100)
        self.accept("a", self.pressedA)

    def pressedA(self):
        print "a pressed, panda window is in focus"
from pandaThread import pandaThread
from direct.stdpy import threading
from qtThread import qtThread,QtGui, QtCore
import sys

class GuiThread(threading.Thread):
    def __init__(self):
        threading.Thread.__init__(self)

    def run(self):
        app = QtGui.QApplication(sys.argv)
        qt = qtThread()
        qt.show()
        print "Running"
        app.exec_()

# GUI thread
gui = GuiThread()
gui.start()

# Panda Thread with main loop
panda = pandaThread()
panda.run()
Using the code above, I am able to separately operate both the event loops. I'll try doing the same with Panda3d's Tasks if it is possible.
Whats next:
Communication between Panda3d and the Qt interface. This is needed to control the scene in Panda3d using the GUI.
I have set up a Google Code page for this 3d-auv-simulator. I'll update the Wiki of the project with the details of all the code and would post the link here on my blog soon.